Getting started
What is Rundown Studio?Create an accountRundown
Rundown basicsColumnsSettingsTrashMentionsText variablesRunning a showImport CSV rundownAPICompanion ModuleEvent
Event basicsSharing eventsSharing and outputs
Read-only rundownEditable rundownOutputPrompterPDF exportCSV exportAccount
Your teamSubscription and invoicesUpdates
ChangelogRundown basics
A rundown contains cues, columns and cells. Get to know how each of these work in this section.
Cue
A rundown cue contains all the elements needed to keep track of a particular show item during a typical live production.

From left to right in the example below:
- A settings icon for making overall changes to the cue.
- The cue number.
- The start time of the cue.
- The duration of the cue.
- The cue’s title or description.
- And finally, cells which contain content.
Hovering your mouse over any of these sections will give you full edit ability of each part of the cue.
Cue start times
Cues can either have a Hard or Soft start time.
Soft time vs Hard time

Soft start time
Soft start time is the most common in Rundown Studio - This is when a cue will start whenever the previous cue is done.
Hard start time
Hard start time is when you know a cue has to start at a certain time of day. Setting a cue to have a Hard start time will most likely cause a gap or overlap. This is a friendly heads up that you will have to time add/remove.
When using a Hard start time you are specifically deciding on a fixed time of day that you plan to start this cue.
This is perfect when - for example - you have a football game starting at 16:00 and that will not change.

Hard start floating bar
This floating bar appears at the bottom of any running rundown (where there is a future hard start cue).
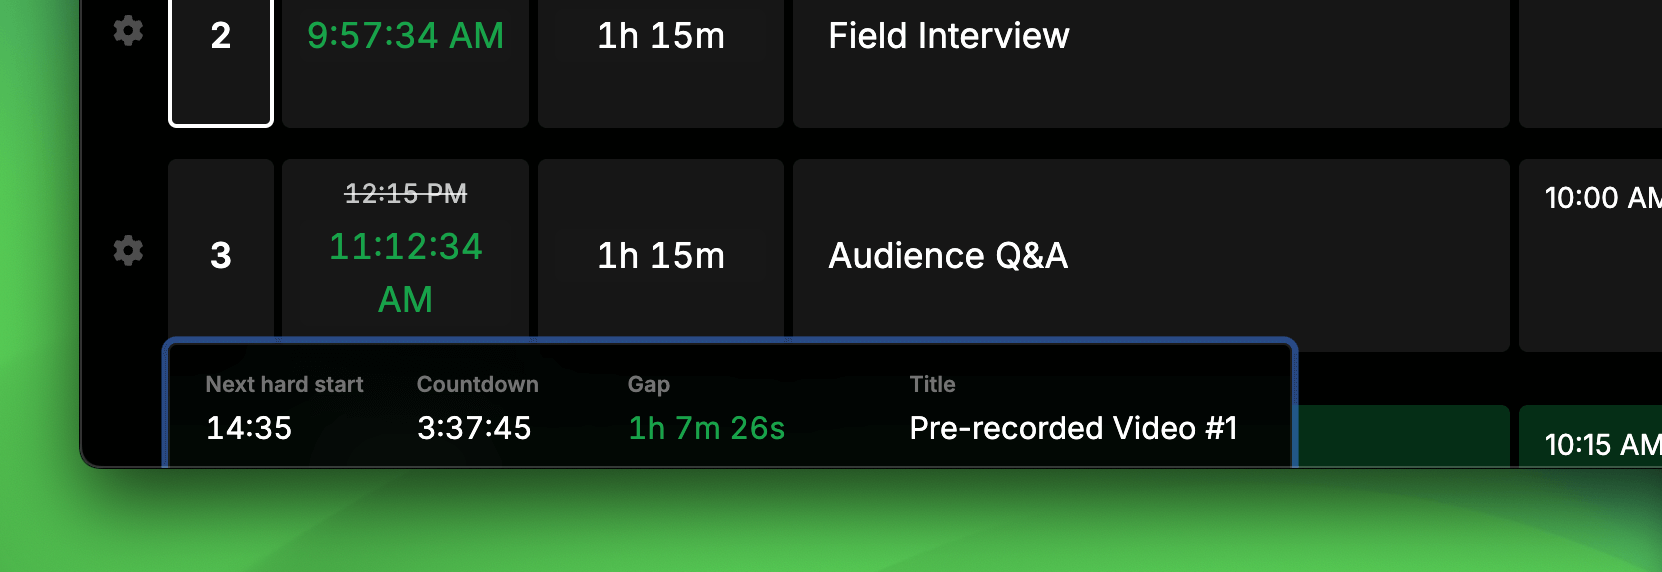
The bar contains:
- Next hard start: The time of day that the hard start is set for.
- Countdown: A ticking countdown clock to the hard start time.
- Gap/Overlap: Any gap or overlap that exists before the hard start cue.
- Title: The title of the cue.
You can even click on the floating bar and the rundown will scroll to the hard start cue.
This feature will be really hand when you have a long pre-show but need to make sure you hit a specific cue at a specific time - all without having to scroll around the page.
Gaps and Overlaps
When using Hard start times you’ll find that gaps and overlaps are created on your rundown. Gaps are nothing to worry about and are helpful to show you where you might want to adjust cues. Overlaps are more important and should be solved so that you can get your show back on time.

On the left of this image you’ll see a gap was created of 1 minute and 40s. This is perfectly fine and can be left as-is. You can of course add that time to any of the previous cues to remove the gap.
On the right of the image is an overlap of 30 minutes. This means you’ll need to remove some time from your previous cues, or move your next cue. Either way you have a conflict that you will want to solve before you get to that part of the rundown.
Setting a duration
A typical change you might want to make to a cue is to set its duration.
Changing the cue duration can be done by clicking on the current duration, and using the inputs to set a duration in the hour:minute:second format.

When done, clicking outside, press enter on your keyboard, or click on save to set the new duration.
Before setting the new time, you can use the Escape key to revert to the original duration.
Auto-start cues
Keep your fingers off the keyboard and mouse with auto-start in Rundown Studio.
Enabling these on your cue means we will take care of the scheduling in the background and the rundown will advance by itself.
What is the difference between Hard and Soft cues?
- Hard Start cue: Cues with a Hard Start can be set to auto-start. This means they will automatically start at the time you have specified.
- Soft Start Cue: All Soft Start cues can be set to auto-start. This means that when the previous cue finishes the rundown will progress and the next cue will automatically start counting down.
Auto-start on Hard Start cues
A Hard Start cue can auto-start when it’s time comes. Here’s how to do it:
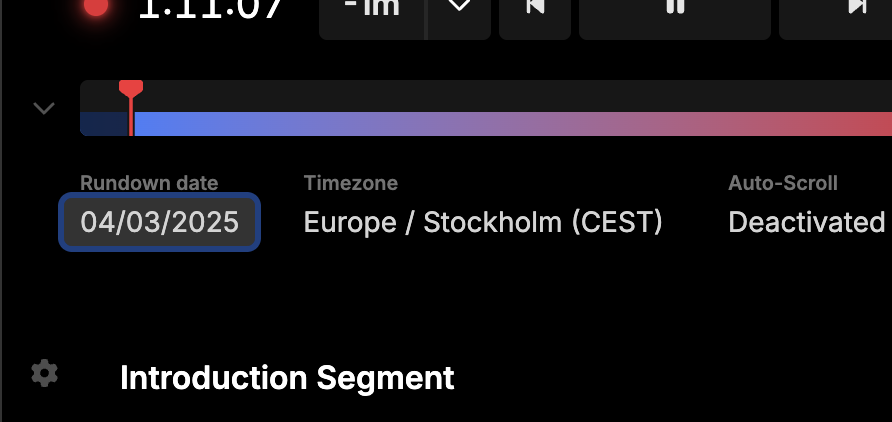
Step 1 - Rundown date
Make sure your rundown date is set to the correct date of your rundown.
You can do this by click on the rundown date at the top of your rundown.
Step 2 - Enable auto-start
Hover your curser on any Hard Start cue (or the first cue on the rundown). You’ll notice the auto-start arrow appear at the top of the cue. Click on it to enable auto-start.
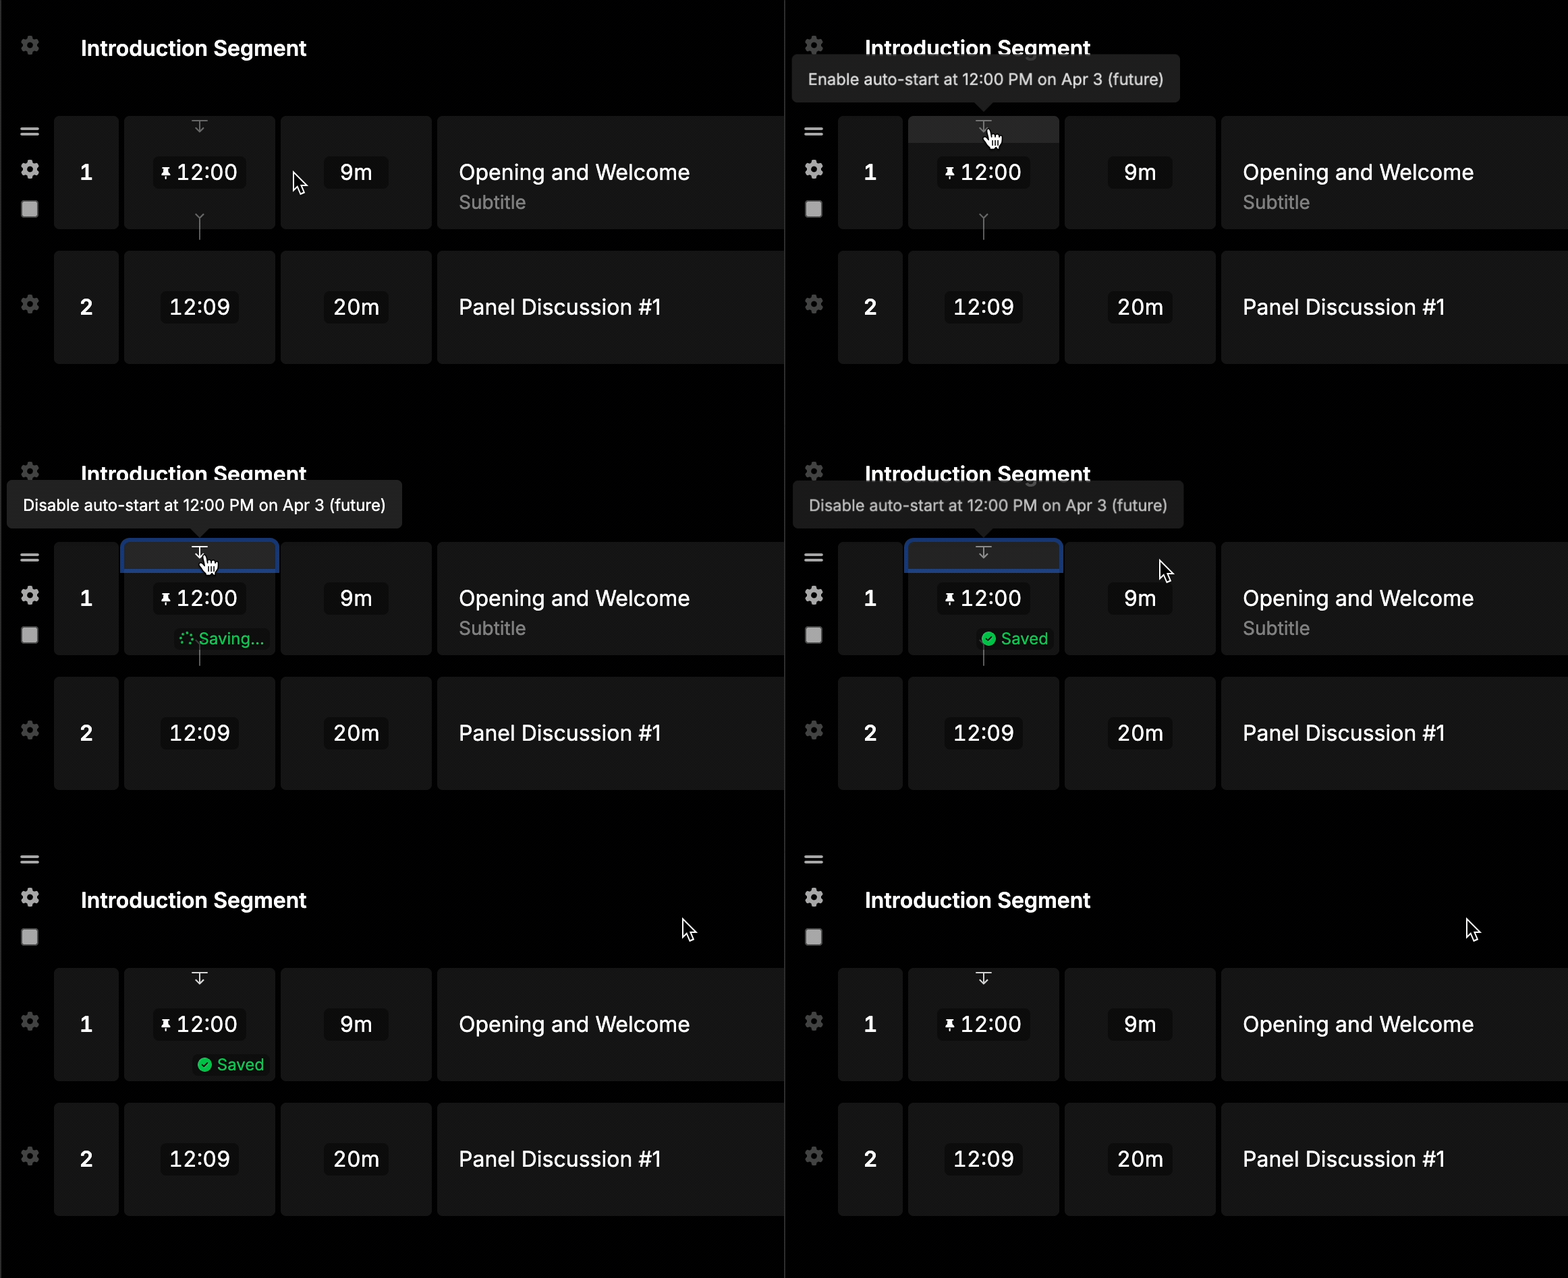
If the start time of the cue is already in the past, you will not be able to enable auto-start. Try moving the time of the cue to later in the day.
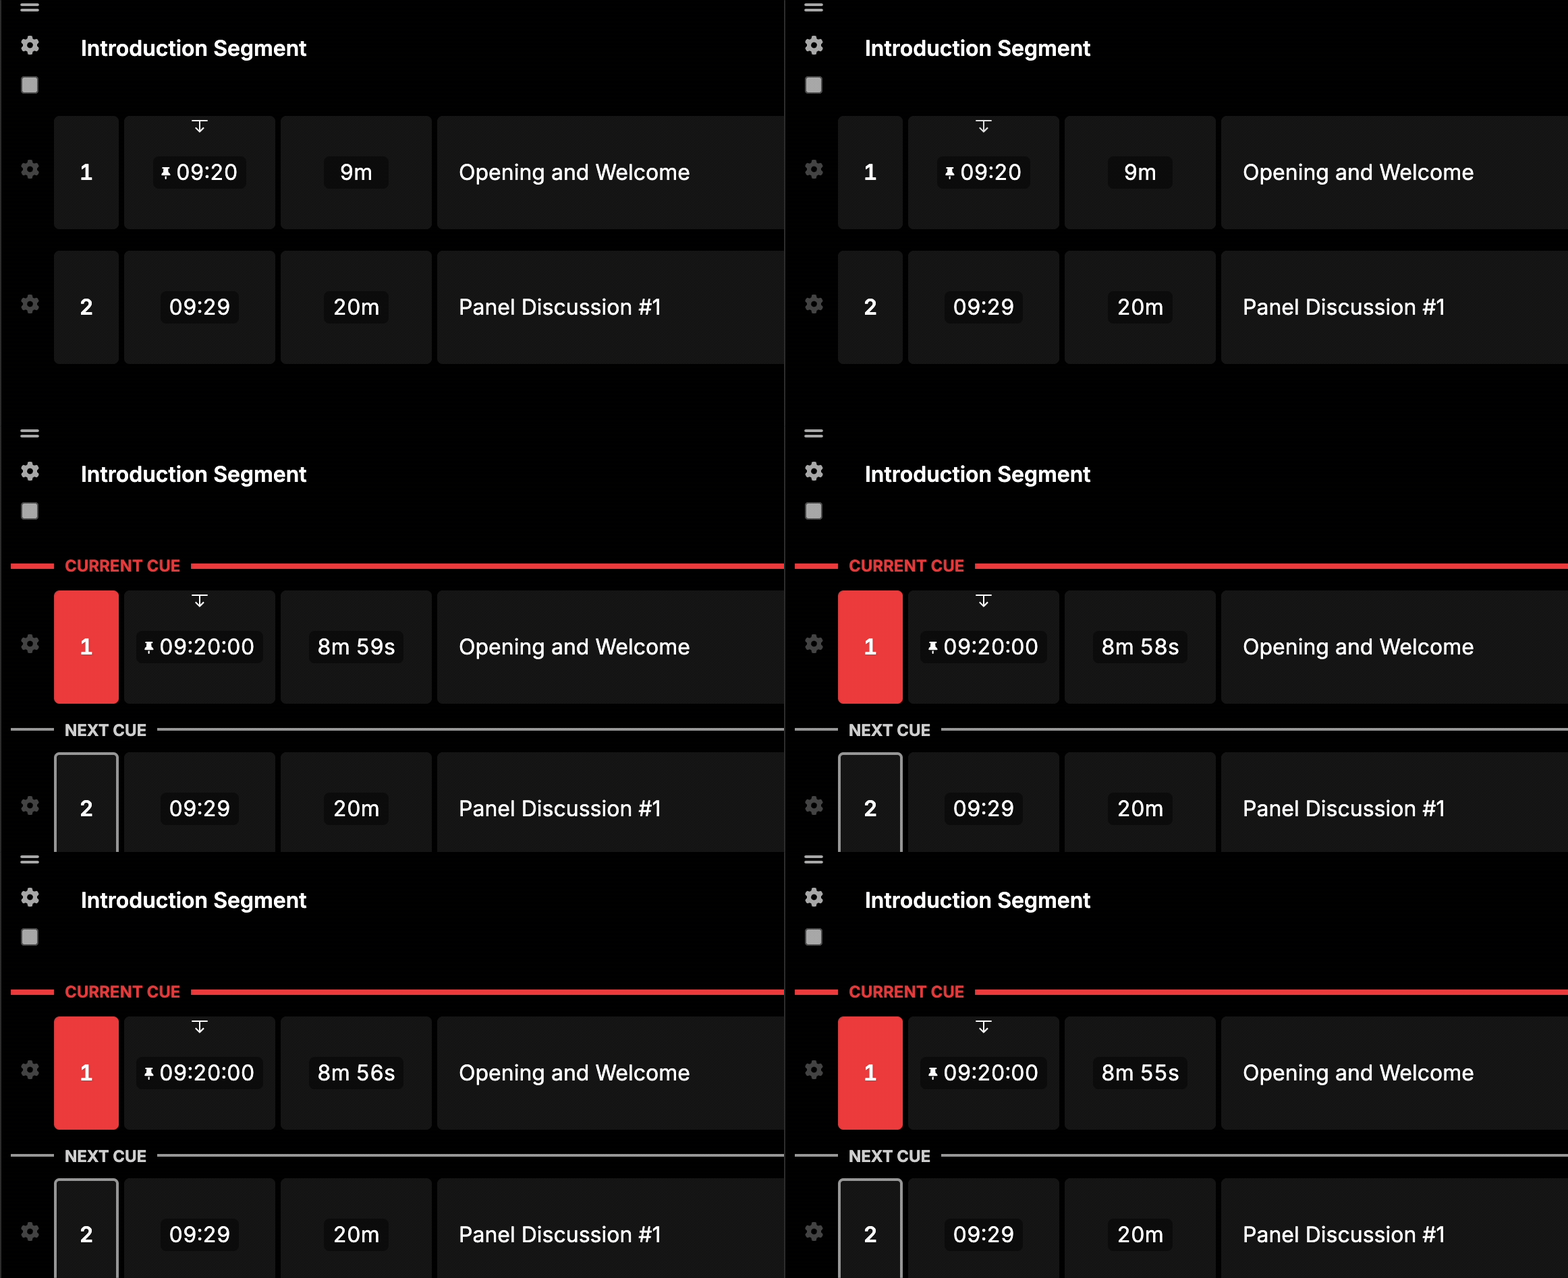
Step 3 - Wait
Now all you have to do it wait for the time to come and the cue will start by itself.
Auto-start on Soft Start cues
A Soft Start cue can auto-start when the previous cue is done. Here’s how to do it:
Step 1 - Enable auto-start
Hover your curser on any Soft Start cue. You’ll notice the auto-start linking line appear at the top of the cue. Click on it to enable auto-start.
You will also notice that the same linking line appears on the previous cue - You can click on either of these linking lines to enable auto-start on the cue.
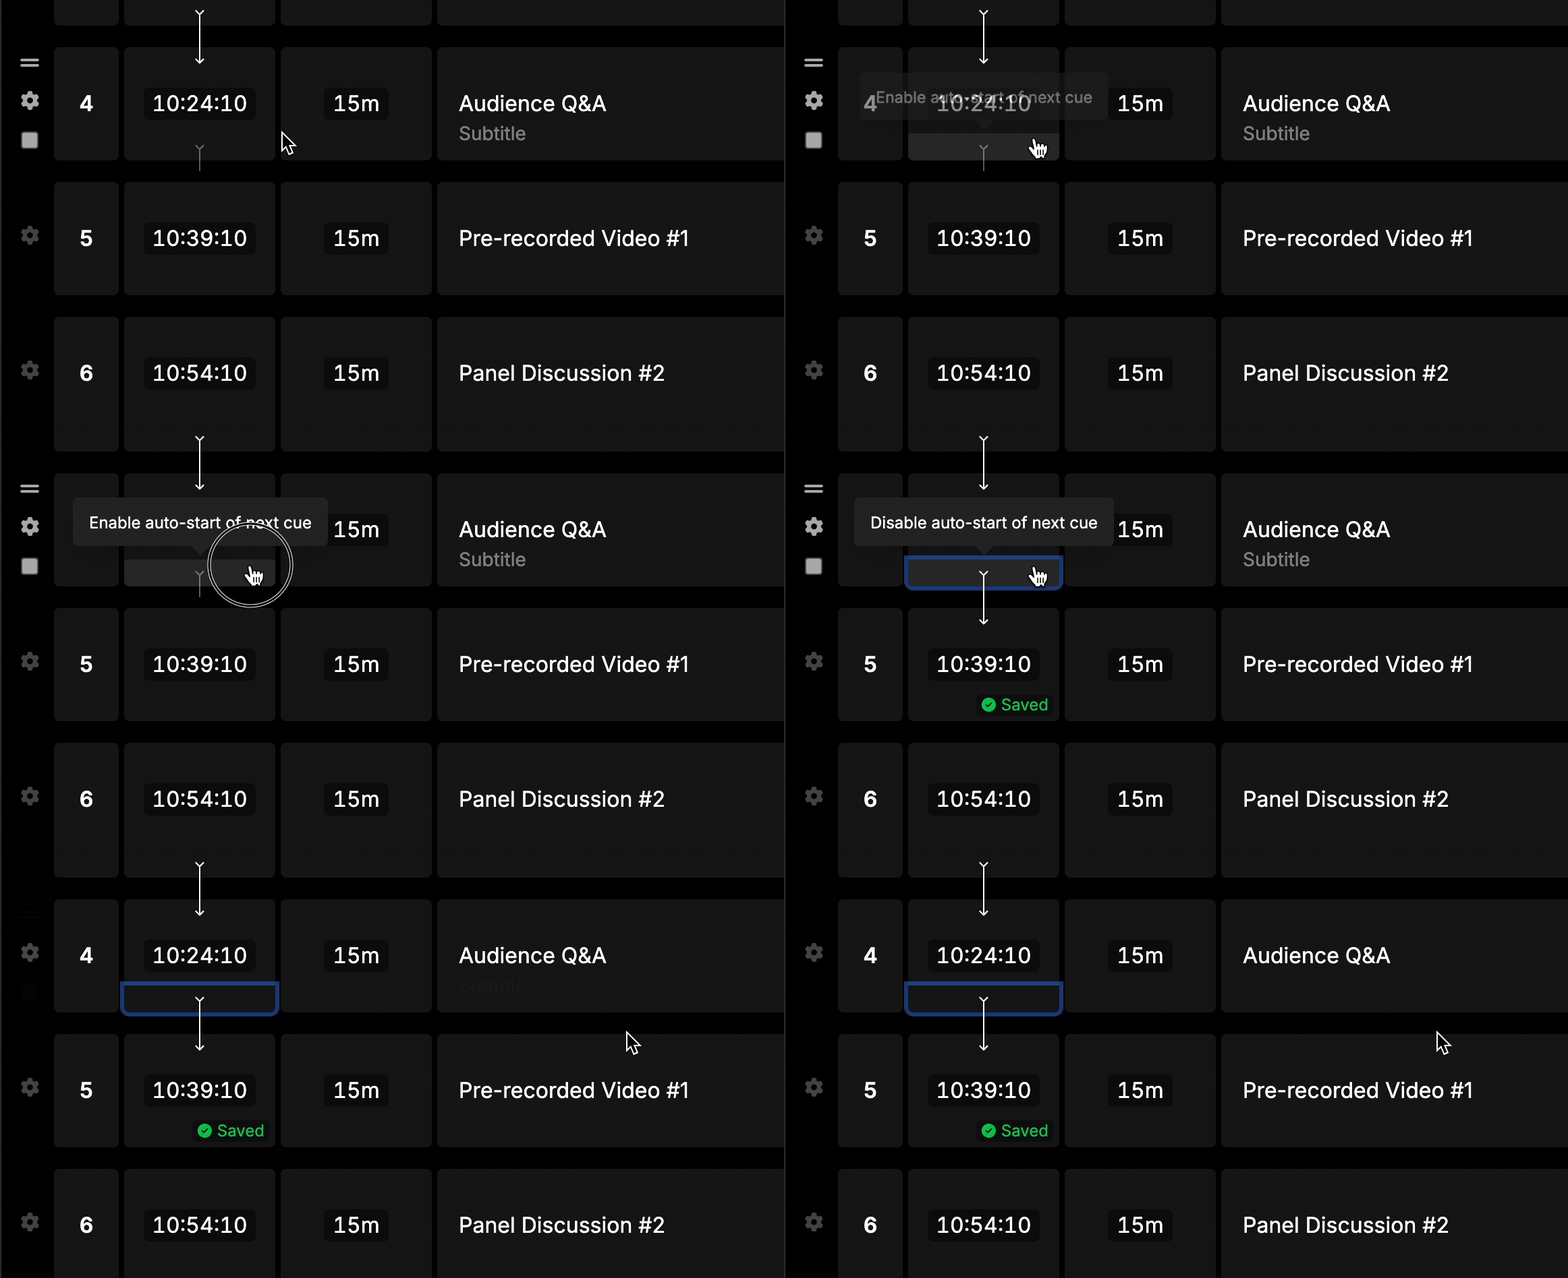
You can of course do this with many of your cues in the rundown which means it will keep automatically advancing to the next cue when the time comes.
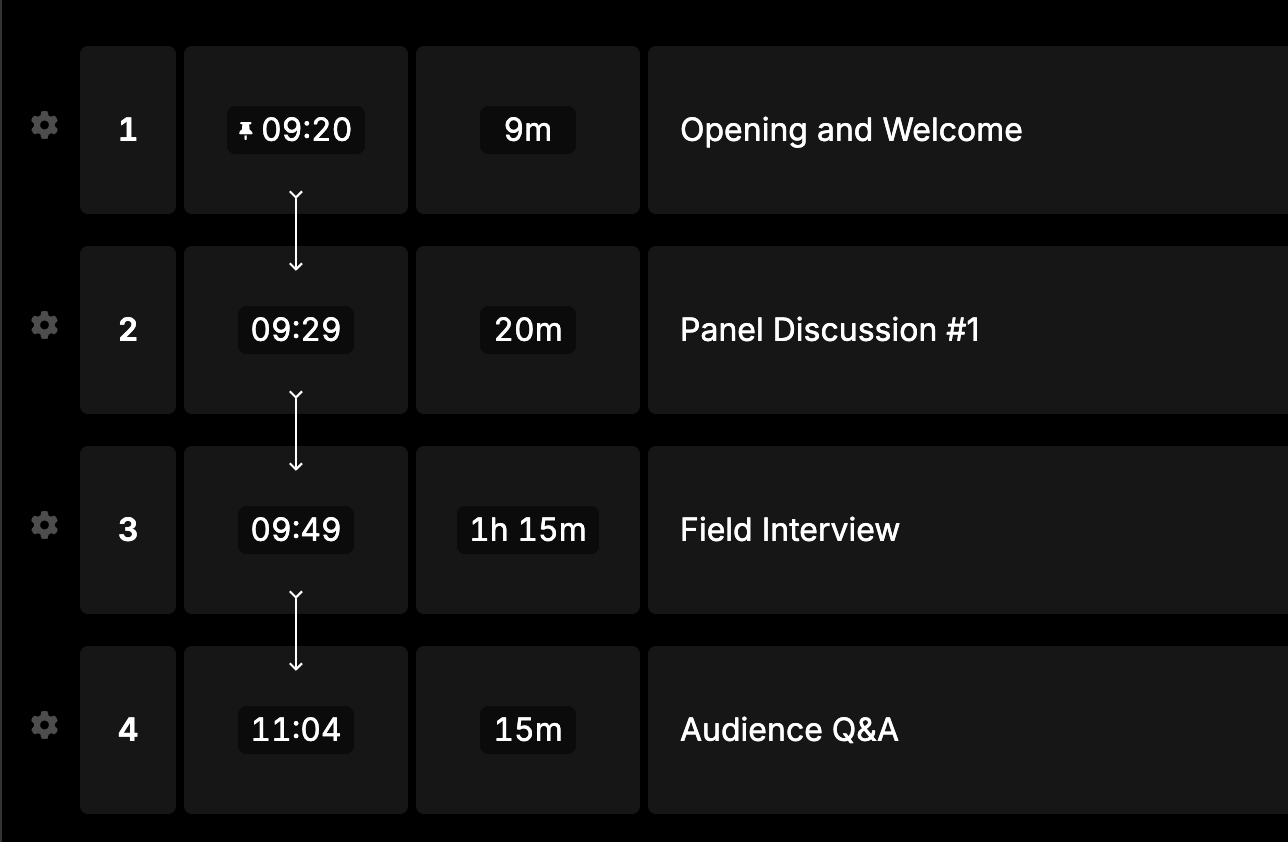
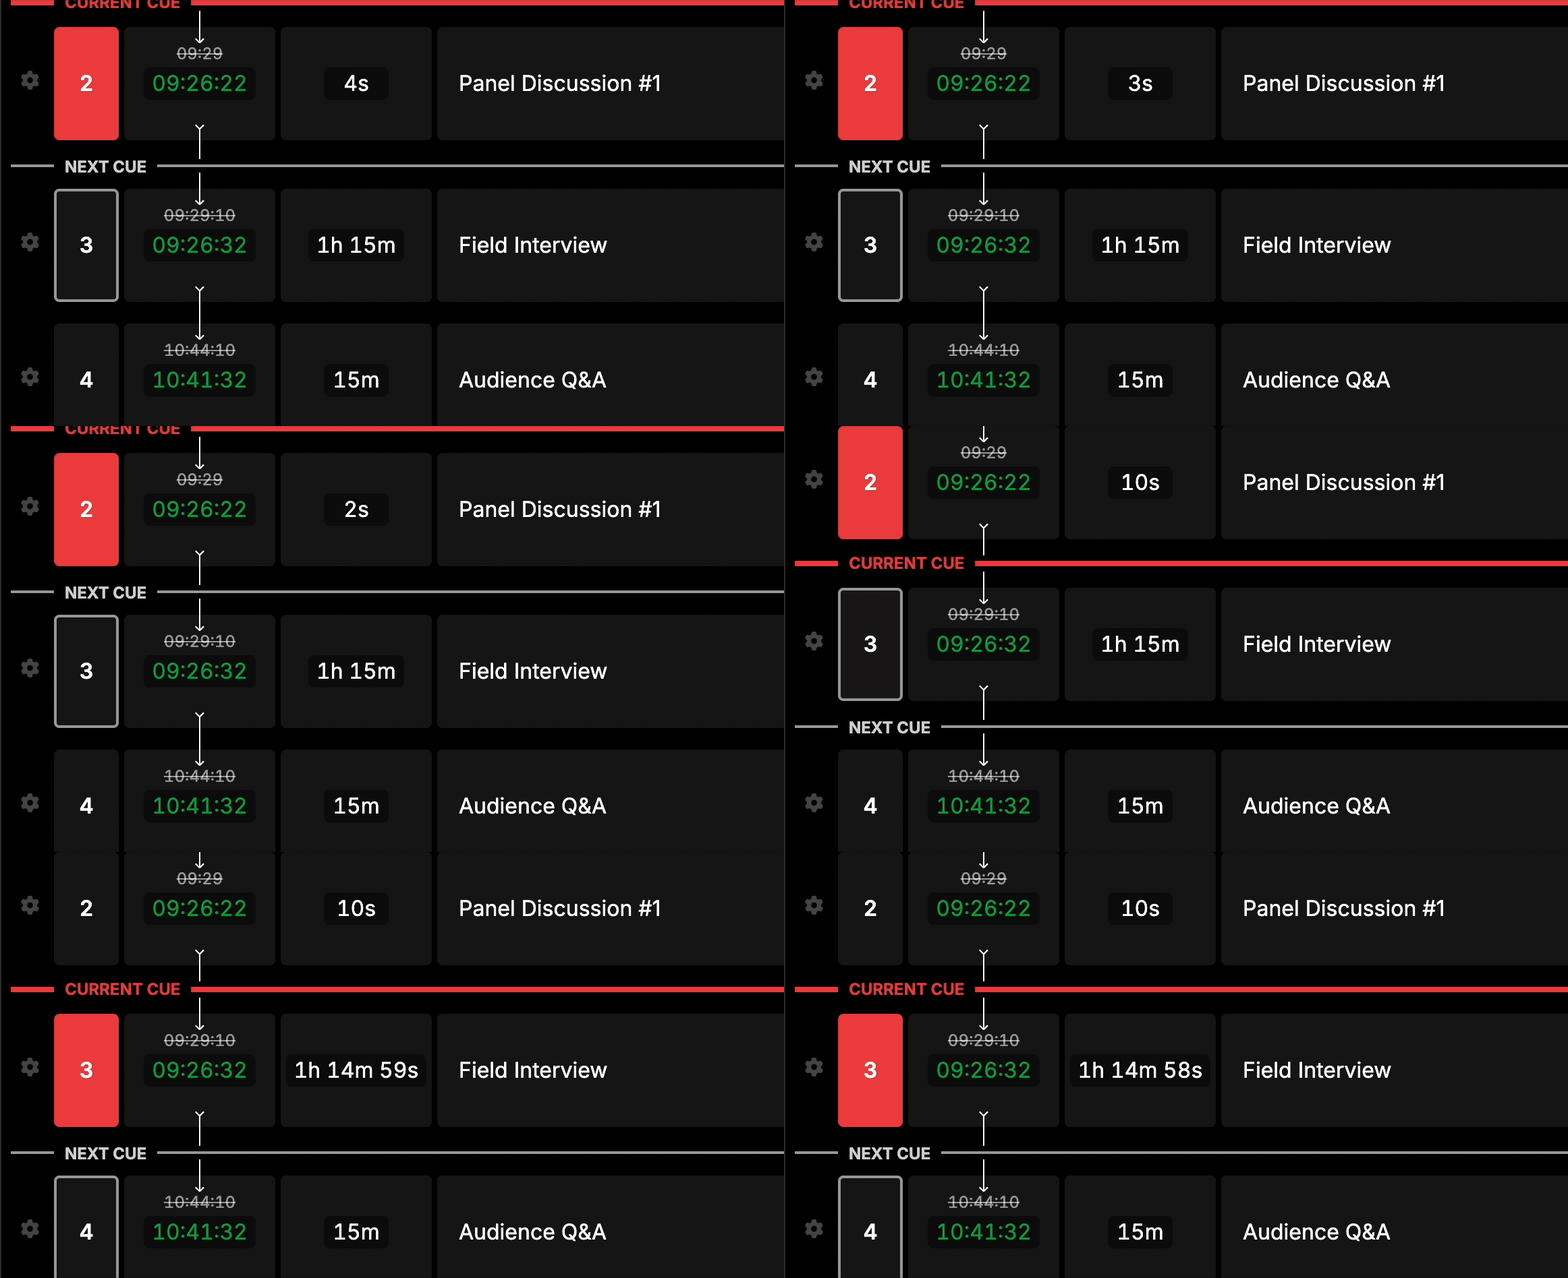
Step 2 - Run your show
Now as you run your show, you will notice that auto-start cues will start when the previous cue’s duration has elapsed.
Columns
Keep track of all sorts of important information with columns.
In this example rundown we have 4 columns - one for each department working on our production. We can use each of these columns to inform and draw attention to important details.
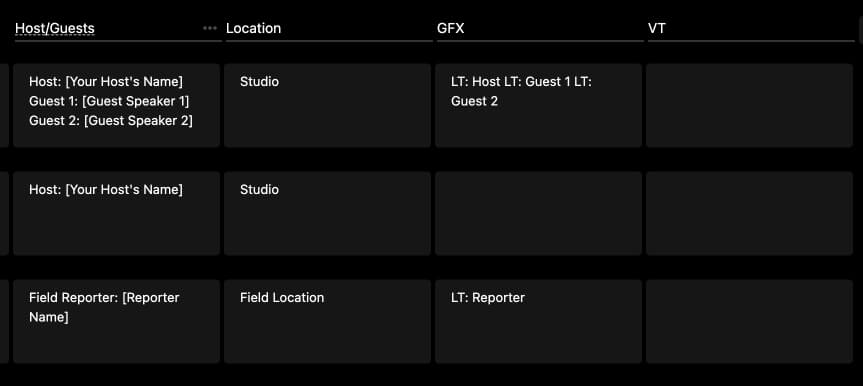
For further reading on creating, editing, reordering and managing columns, check out the Columns documentation.
Cells
A cell within Rundown Studio can be “Richtext” or a “Dropdown” - Each are slightly different, so let’s explore how you might use them.
In this example the “Notes” column is set to “richtext” and the “Camera” column is set to “dropdown”.
Richtext
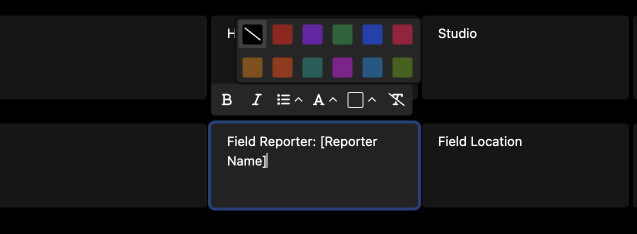
A richtext cell allows for text, highlighting and color options, and drag-and-drop of images.
With some text selected, I can set all sorts of formatting and color options - or choose to remove all styles.
File uploading
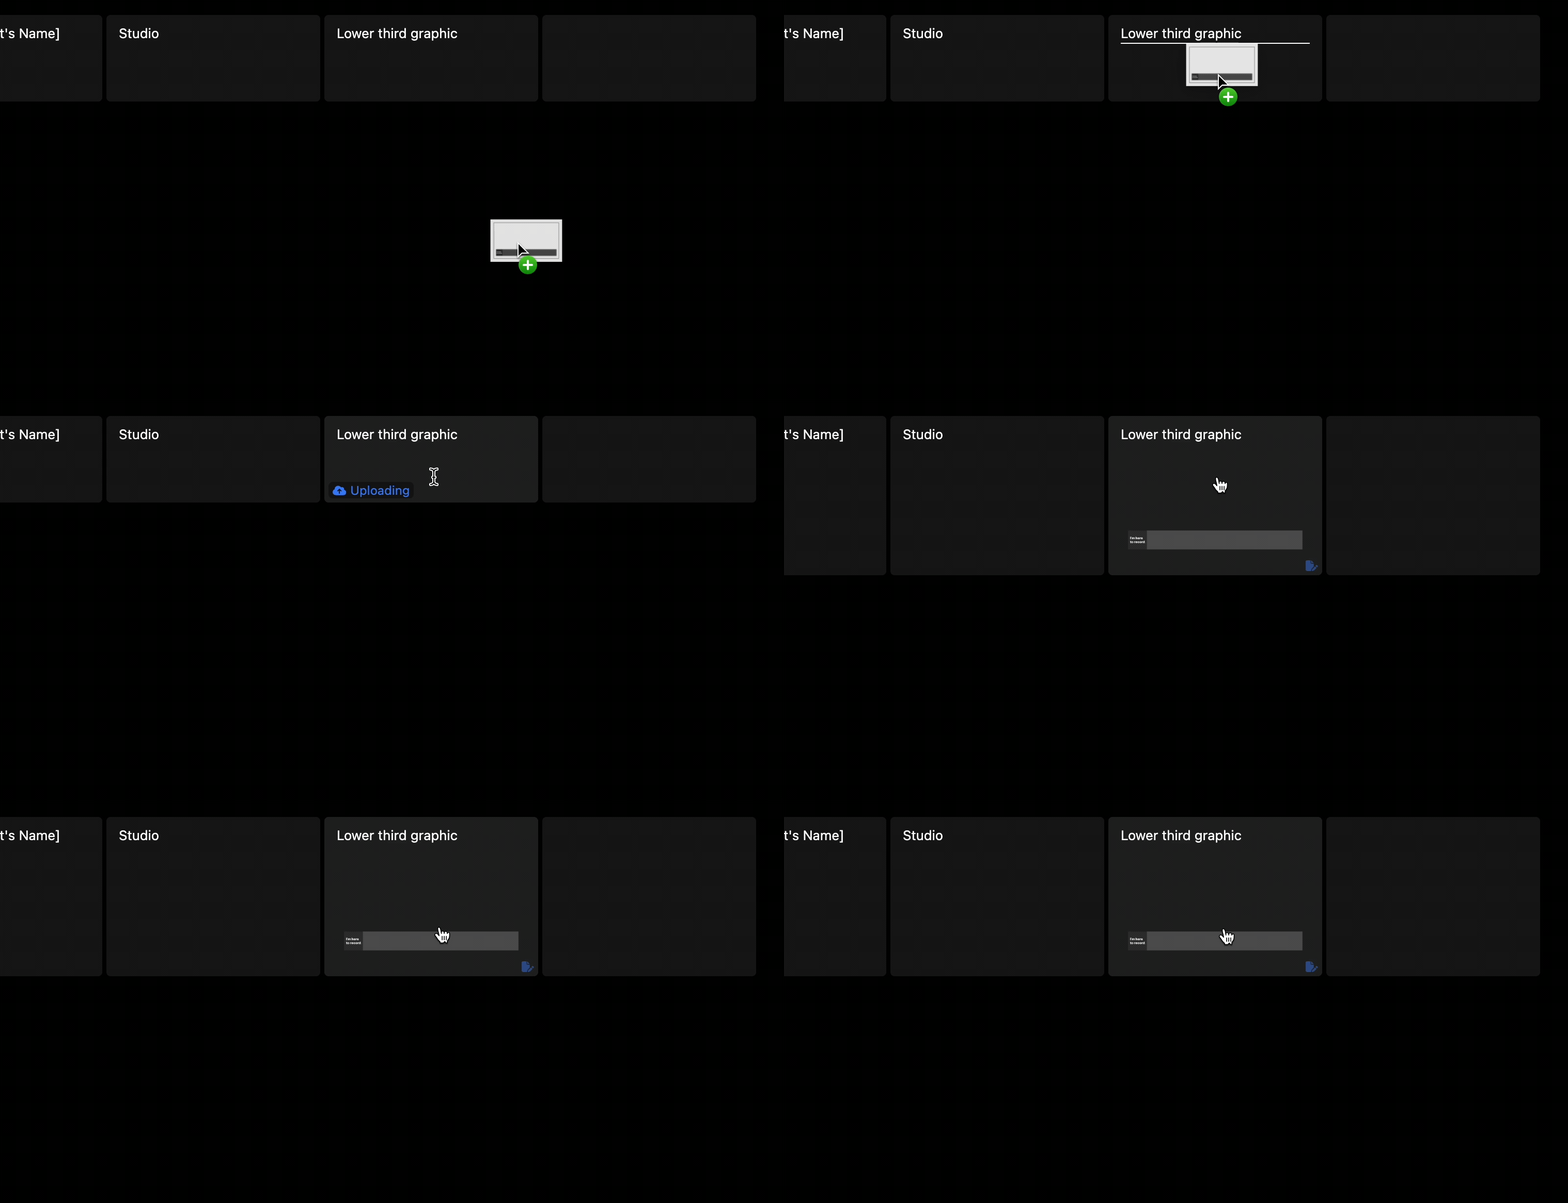
Cells also accept all sorts of file types which can be dragged-and-dropped right into your cell.
Accepted files
We accept: Images, PDFs, Document files (like .docx, .csv), Video files, Audio files, and lots more
Drag and Drop
Upload a file to Rundown Studio by dragging it right into any cell.
Dropdown
A dropdown column will allow for a selection between options - great for choosing between a pre-defined list of camera angles, or status’.
With this dropdown list, the show caller or producer can instruct a camera operator which type of shot to frame for each cue.
By choosing “Edit options”, they can also add in several more camera angles which will later appear on the dropdown list.

Batch editing
You can build shows much fast with batch editing of cues.
Start by selecting a cue to bring up the batch menu.
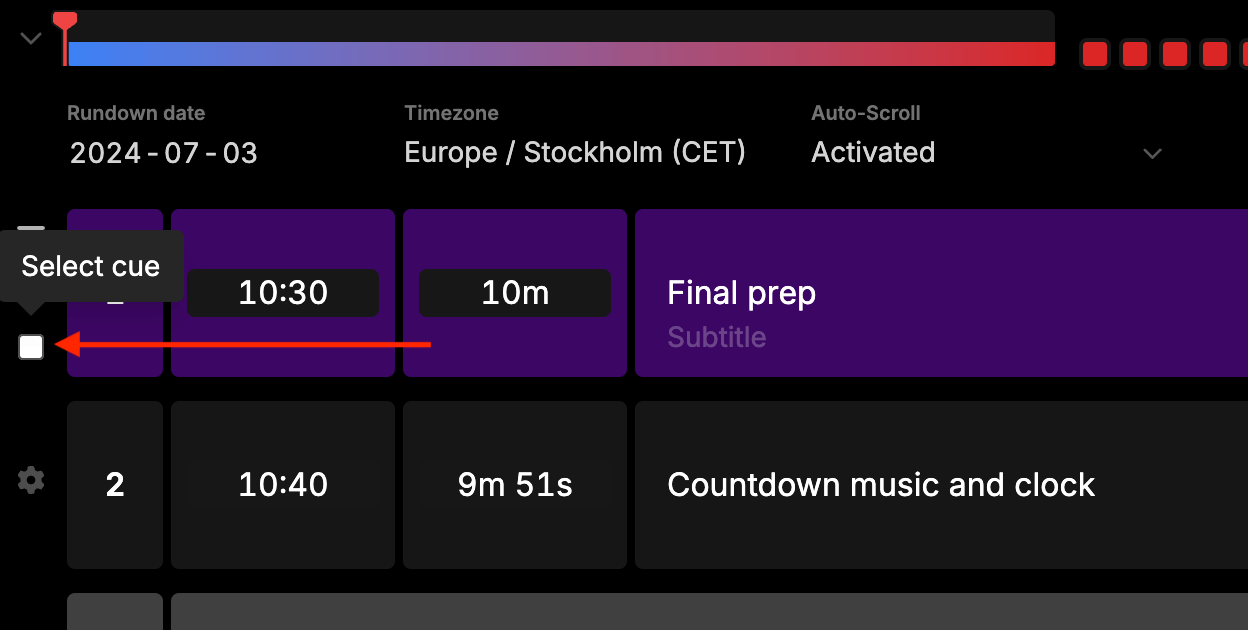
With one (or multiple) cues selected, the batch menu will appear at the top of your screen. This menu will allow you to perform batch operations on all the selected cues.

This menu will allow you to:
- Select all: Select all cues on your rundown.
- Duplicate: Duplicates all the selected cues.
- Group: Group selected cues.
- Ungroup: Remove all cues from a selected group.
- Move: Move the selected cues to the start/end any position on your rundown.
- Background: Change the background color of all the selected cues.
- Delete: Remove the selected cues from your rundown.
- Clear selection: Hides the batch bar and un-selects all selected cues.
Hold down SHIFT to select many cues at a time.